Originally published at: Roulette Upgrade – BrainPad
How it works
This project takes the LED Roulette project to the next level. We’ll add a battery to make the game portable. We’ll also use DUE script to code the project, and we’ll use the BrainPad case for our enclosure.
Hardware
Just like the classic MakeCode version, we’ll be using the same basic hardware.
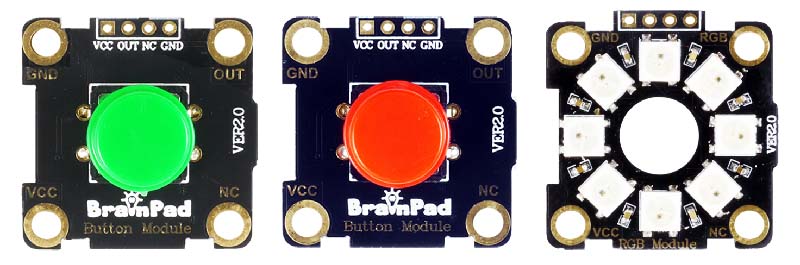
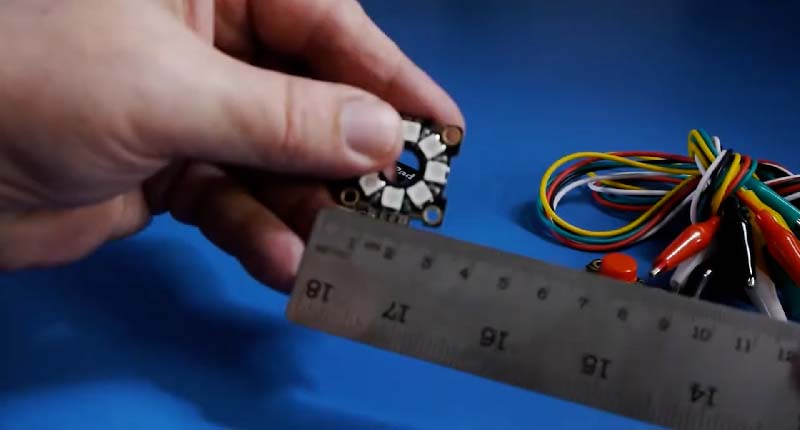
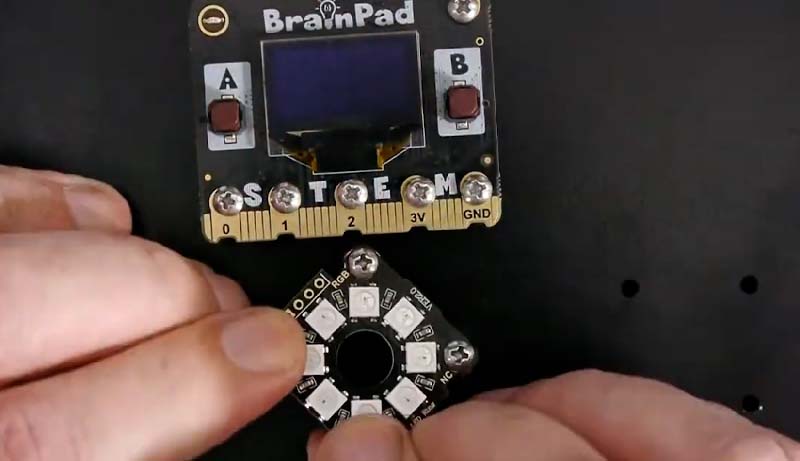
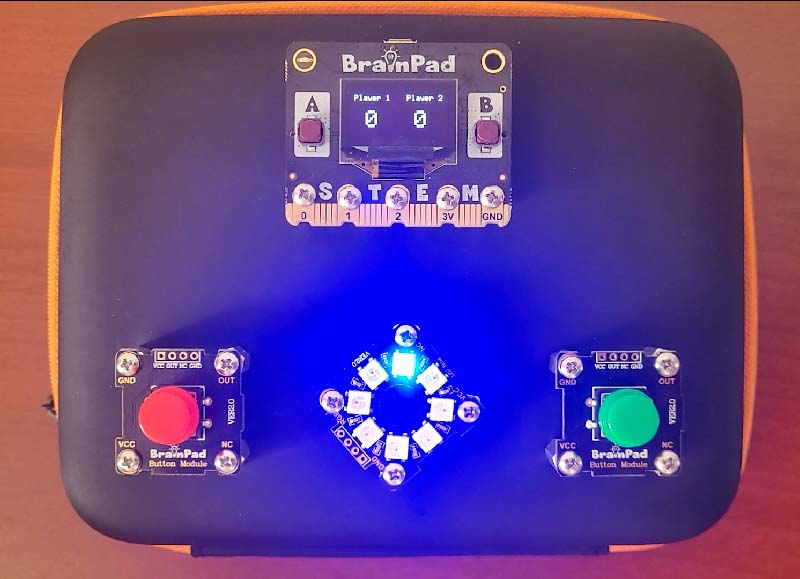
2 buttons and the LED Ring modules.
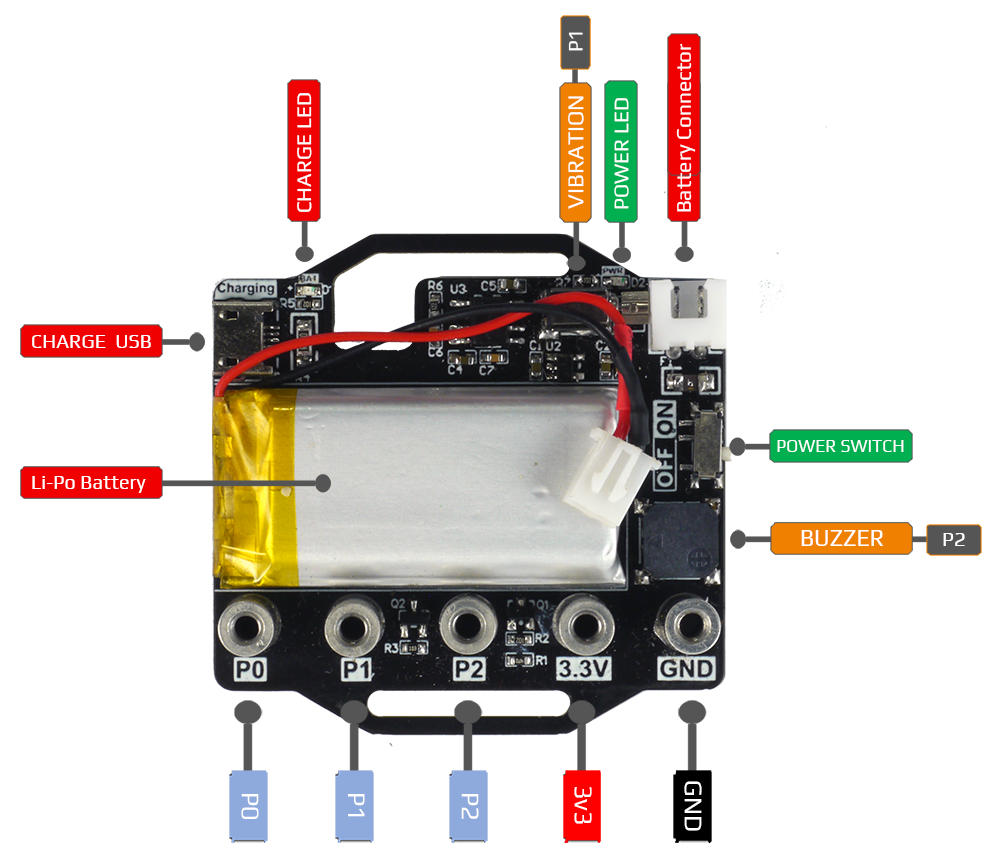
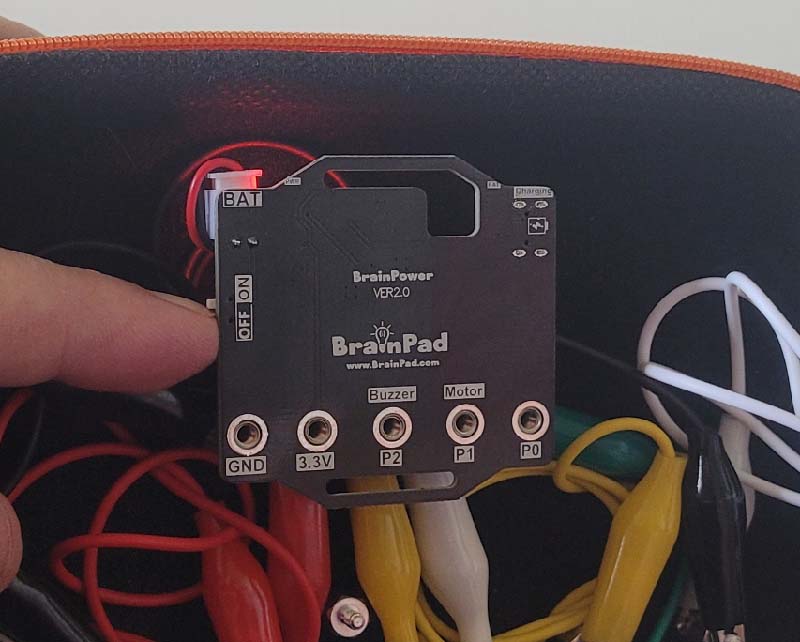
We can use the BrainPower accessory kit to provide the power for our project. Notice that BrainPower uses P1 for the vibration motor, and P2 for the Buzzer, since we need to use these pins for our buttons, we won’t connect P1 & P2 to the BrainPad microcontroller.
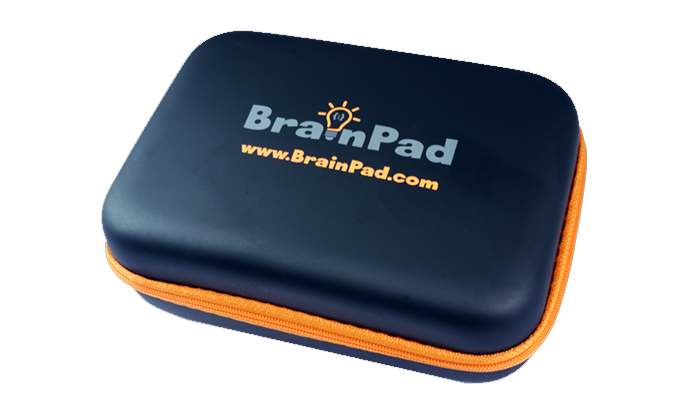
We’re going to add another twist to the project, we’re going to use the BrainPad Clip case that came with the modules as our enclosure. Keep in mind though this will work with any cardboard box or custom made enclosure you create.
The first step is measure the distance between the holes of our components. This will tell us where to put the holes in our case.
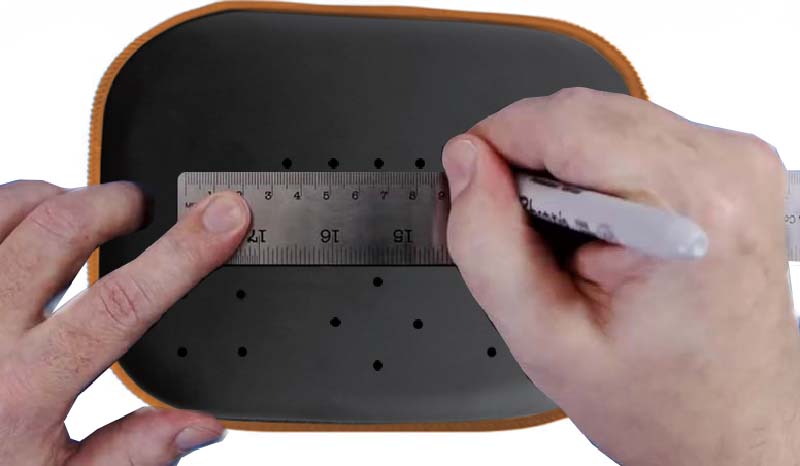
Next mark the position of the holes on the case where we’ll be placing the BrainPad Pulse and each of the modules.
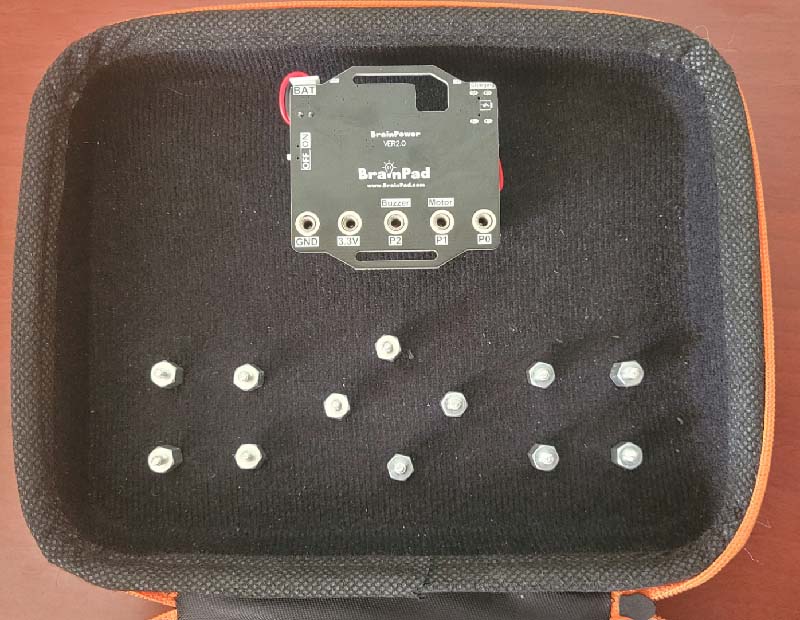
We’ll need 32 metal stands-offs. First attach stand-offs to the BrainPad Pulse and each module
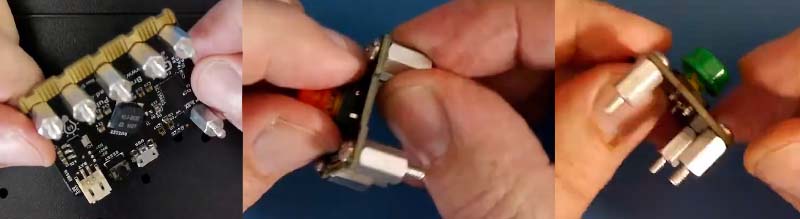
Place the BrainPad Pulse and each module into the holes we drilled on the enclosure.
Flip the case over and attach the remaining large stand-offs.
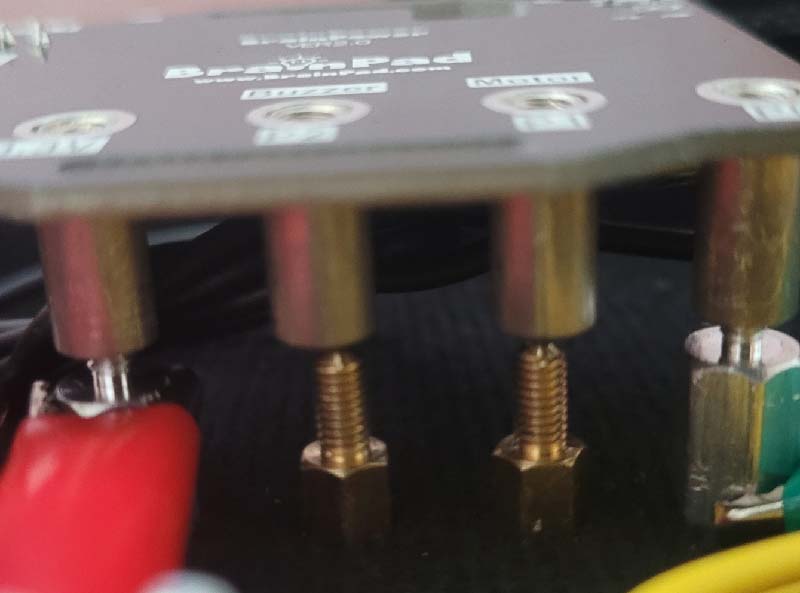
Connect the 2 smaller standoffs to the P1 & P2 large stand-offs poking through the case. Make sure these small stand-offs don’t make contact with the BrainPower. This will allow us to use these pins for our buttons.
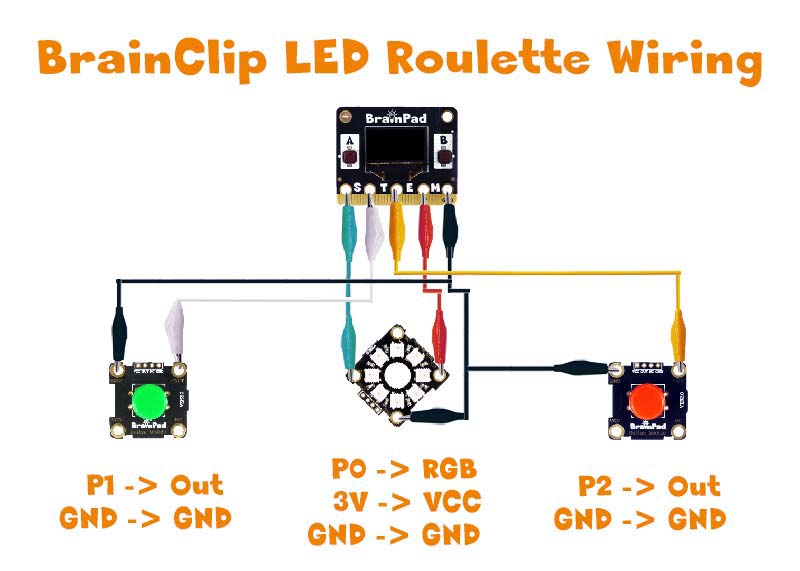
Use the wiring diagram below to attach wires to the stand-offs on on the bottom of our enclosure. We can look at the bottom of the BrainPower to see where to connect to the BrainPad Pulse, you may have to flip back and forth to ensure you’re connecting to the correct stand-off on the modules.
It may look like a mess, but each alligator clip is connected to our BrainPad Pulse. In the case of the GND pad you should have 2 alligator clips connecting components to GND stand-off on the BrainPad Pulse. We can also daisy-chain the GND connection between the modules, as long as one of them connects to the BrainPad Pulse GND . Ensure that none of the other alligator clips are touching each other or more than one stand-off.
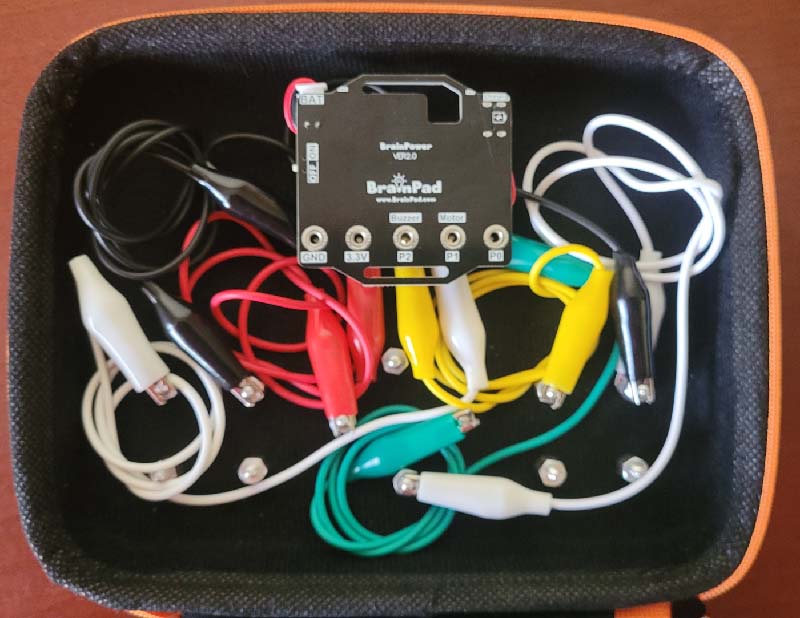
Also make sure that the 2 alligator clips connecting our buttons to P1 & P2 don’t touch the BrainPower module stand-off.

When we need to turn on our game, we just need to use the power switch located on BrainPower. When it time to recharge the battery we can connect the micro-USB cable to the charging port on BrainPower.
Once the construction is complete, we’re ready to add some code to create our game.
The Code
For this project we’ll use DUE Script, the version found on BrainPad MakeCode site will also work, but let’s use DUE Script and type some REAL code.
BtnEnable(1, 1) # Enable Green Button on Pin1
BtnEnable(2, 1) # Enable Red Button on Pin 2

L = 0 # Left players score
R = 0 # Right players score

Score() #Draws score on screen

@Loop
    For i = 0  to 8
        NeoClear()
        NeoSet(i,0,0,100)

        if i = 3
            NeoSet(i,100,0,0)
        End

        if i = 7
            NeoSet(i,0,100,0)
        End

        NeoShow(0, 8)

# Check for Green Button Press
        if BtnDown(1) = 1
                if i = 3 #If LED position at player update score
                    R = R + 1
                End
            Score()
            Beep('P', 261, 100)
            Wait(200)
        End

# Check for Red Button Press
        if BtnDown(2) = 1
                if i = 7 #If LED position at player update score
                    L = L + 1
                End
            Score()
            Beep('P', 400, 100)
            Wait(200)
        End
        Wait(100)

#Check for Player Win
        if L = 5 || R = 5
            Rainbo()
        End
    Next
Goto Loop

#Game Over Lights and Sound
@Rainbo
    @Loop
        For i = 0  to 8
            NeoClear()
            NeoSet(i,Rnd(255),Rnd(255),Rnd(255))
            NeoShow(0, 8)
            Beep('P', Rnd(294-261)+261, 100)
            wait(100)
        Next
    Goto Loop
Return

#Update Screen Score
@Score
    LcdClear(0)
    LcdText("Player 1",1,5,10)
    LcdTextS(Str(L),1,20,30,3,3)
    LcdText("Player 2",1,75,10)
    LcdTextS(Str(R),1,85,30,3,3)
    LcdShow()
Return