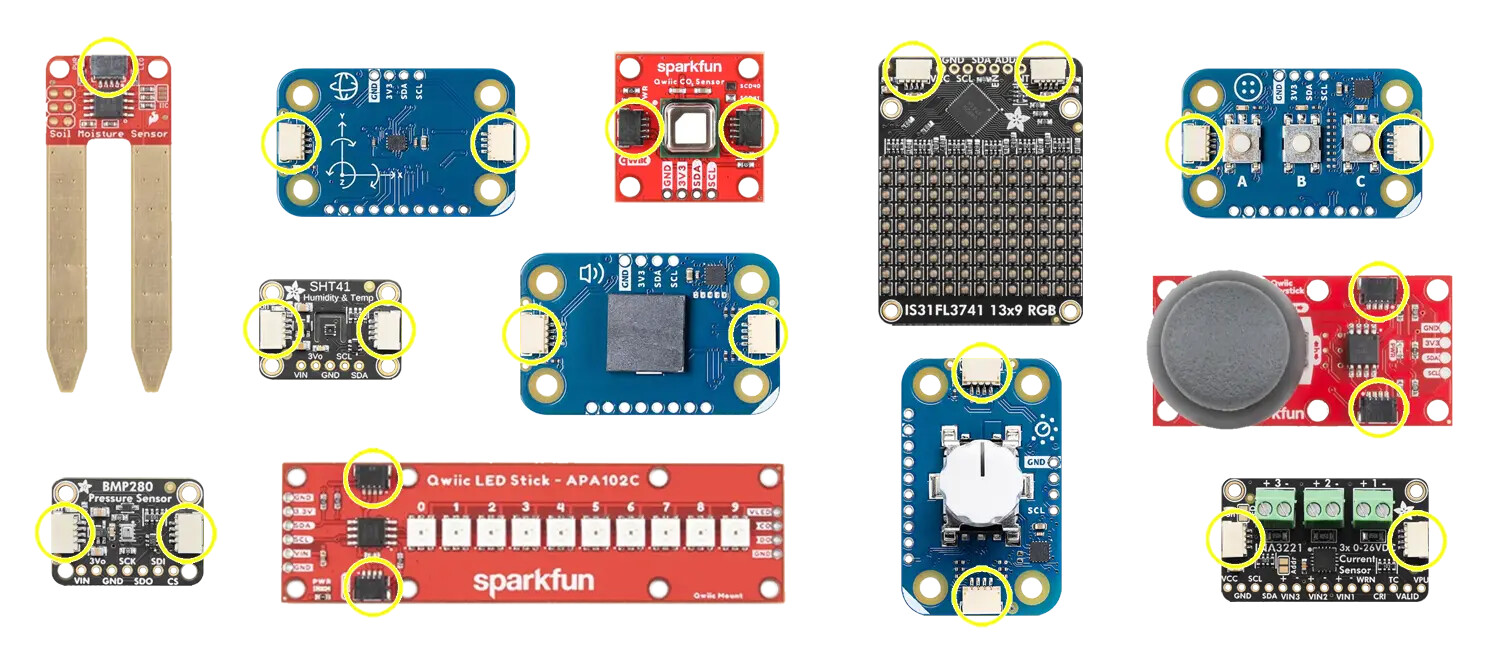
There are a lot of module options that share the same JST connector as DUELink modules.
You can benefit from these modules using their I2C bus and an Arduino for example. But, then how can you use high level languages like Python? SparkFun shows us how to do so using Raspberry Pi, which supports Python and has an I2C interface GitHub - sparkfun/Qwiic_Py: Python package for the qwiic system. This is great but what if we have a vision/AI project on a PC and we need to add a physical element to it?
This can be done by using any DUELink module as a bridge between the PC and SparkFun Qwiic Joystick for example. Let’s cover some background to show you how this can be done!
DUELink modules can use I2C, UART and even USB: Interfaces | DUELink . Meaning these module can connect to a PC’s USB port directly.
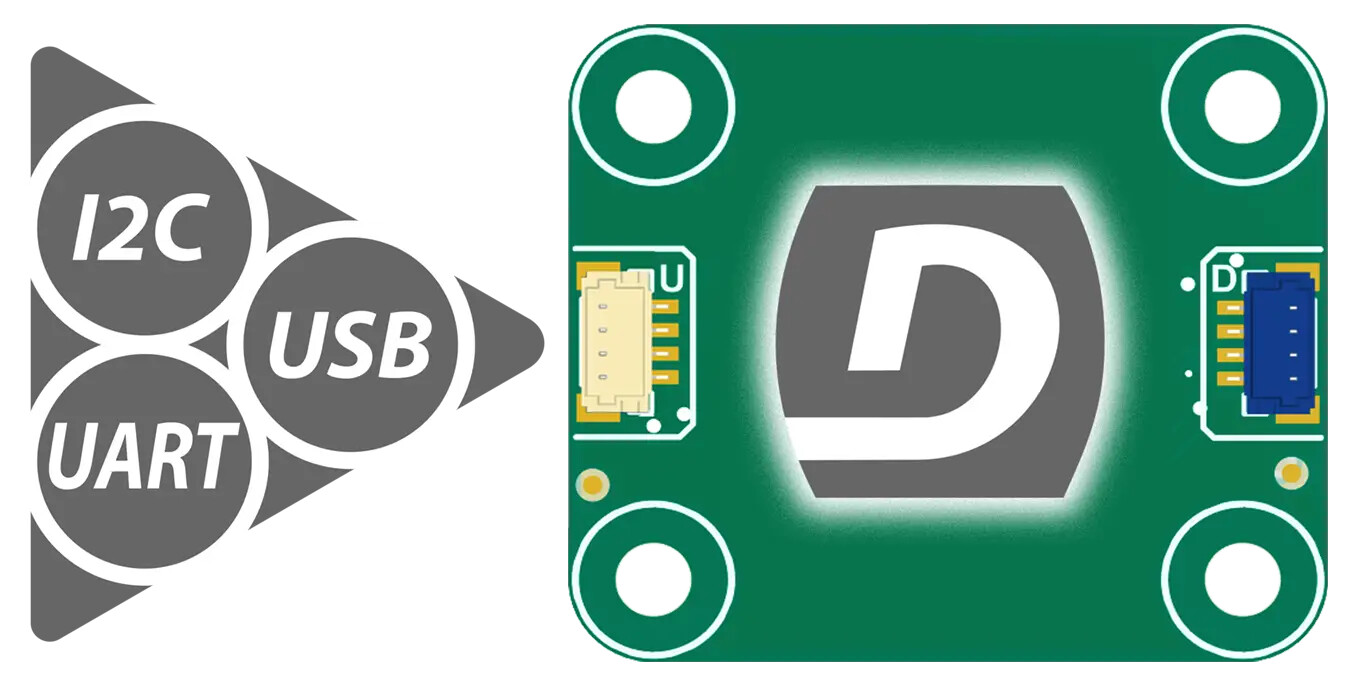
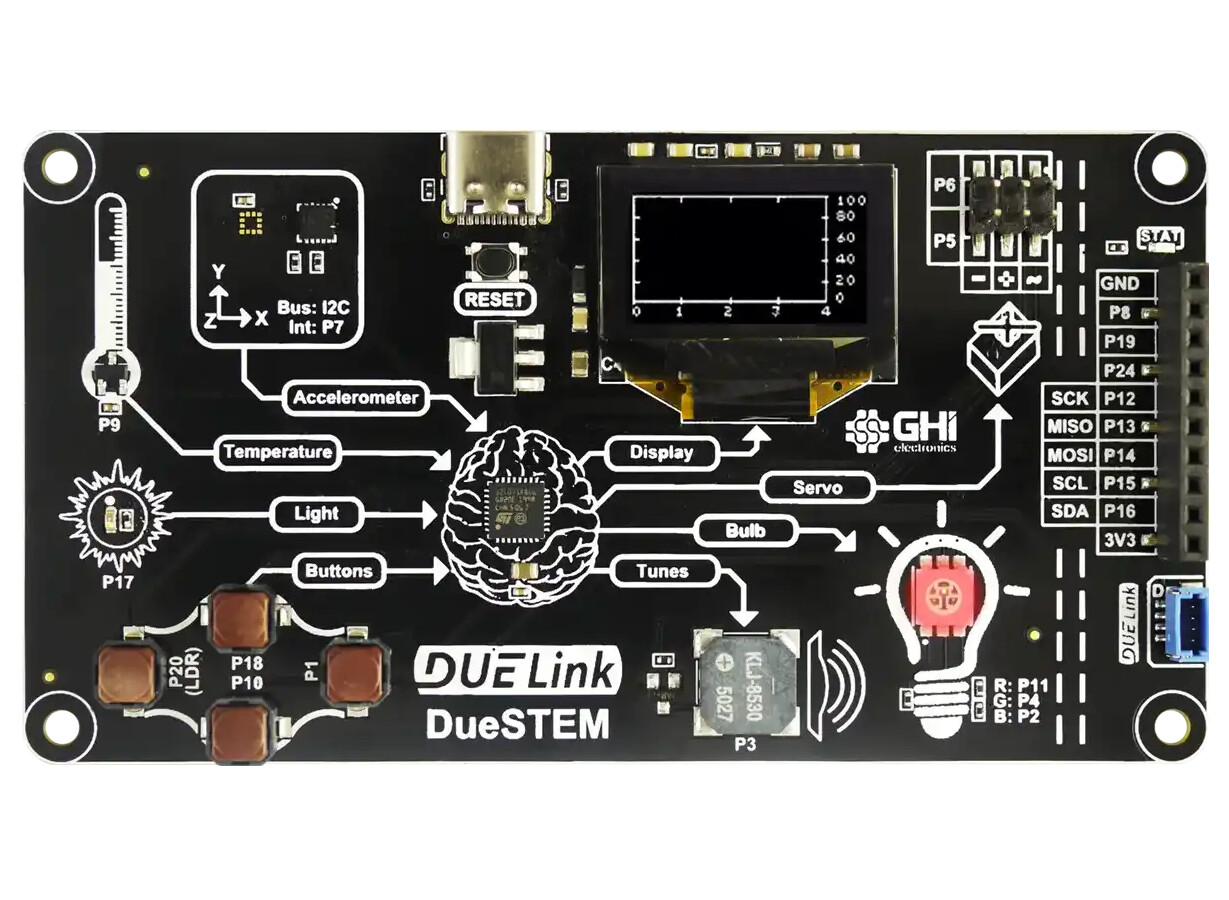
We did not stop there and added libraries to simplify the use of many major coding languages, including JavaScript | DUELink and Python | DUELink . Some modules include a built-in USB connection, like DUELink DueSTEM for example.
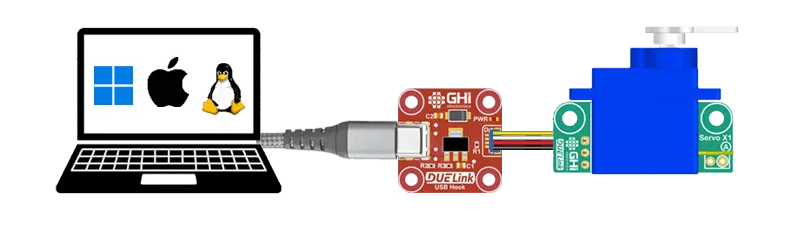
Other modules do not have a USB and require a USB adaptor. This can for example be a DUELink Servo motor connected to USB Hook.
Controlling the Servo from Python is very easy, let me show you!
from DUELink.DUELinkController import DUELinkController
availablePort = DUELinkController.GetConnectionPort()
print("Using port: ", availablePort)
duelink = DUELinkController(availablePort)
# Servo on pin 1 to 90 degrees
duelink.Servo.Set(1, 90)
Now, back to SparkFun Qwiic Joystick. Since all DUELink modules allow switching its Downlink connector to I2C, the joystick can be used. Similarly, you can use Adafruit STEMMA, Arduino Modulino, or any I2C device!

Here is a Python example that runs on a PC to access SparkFun Qwiic Joystick that is connected to the Downlink connector on any DUELink module!.
# In this projects:
# Read X,Y and button state each 500ms
import time
from DUELink.DUELinkController import DUELinkController

availablePort = DUELinkController.GetConnectionPort()
duelink = DUELinkController(availablePort)

def Initialize():
    duelink.Engine.ExecuteCommand("dim b0[4]")  # Store X and Y: 2 bytes for X, 2 bytes for Y
    duelink.Engine.ExecuteCommand("dim b1[1]")  # Button state: 1 byte
    duelink.Engine.ExecuteCommand("DLMode(5,0)")  # Switch to I2C downlink mode


x = 0
y = 0
btPressed = False


def ScaleToPercentInt(value):
    if value < 0:
        value = 0
    if value > 65535:
        value = 65535

    return (value * 100) // 65535


def ReadXY():
    global x, y

    data = bytearray(4)
    duelink.Engine.ExecuteCommand("dli2cwr(0x20,[0x03],b0)")
    time.sleep(0.05)

    duelink.Stream.ReadBytes("b0", data)

    # Convert to the [0...100] range
    x = ScaleToPercentInt((data[0] << 8) | data[1])
    y = ScaleToPercentInt((data[2] << 8) | data[3])

    time.sleep(0.05)


def ReadButton():
    global btPressed

    duelink.Engine.ExecuteCommand("dli2cwr(0x20,[0x07],b1)")
    time.sleep(0.05)

    state = bytearray(1)
    duelink.Stream.ReadBytes("b1", state)

    btPressed = (state[0] == 0)


Initialize()

while True:
    ReadXY()
    ReadButton()

    print(f"X: {x}, Y: {y}, Button Pressed: {btPressed}")

    time.sleep(1)
The provided Python library exposes the entire Standard Library | DUELink but some special advanced commands are left out, like Downlink I2C commands. Those are accessible by invoking ExecuteCommand()as shown.
SparkFun Qwiic Joystick driver code in Python and other languages is found on GitHub.