STEAM, specifically the M (Math) is what we are discussing today. I want to share a little trick a learned ages ago, when I first started learning game development. How do you make a sprite bounce on the screen?
By the way, you can do all this on the simulator online. You do not need a BrainPad to try this. First, go to https://makecode.brainpad.com and then from under the blocks menu select ADVANCED > EXTENSION then select “game”. The game extension lets you add sprites on the screen.
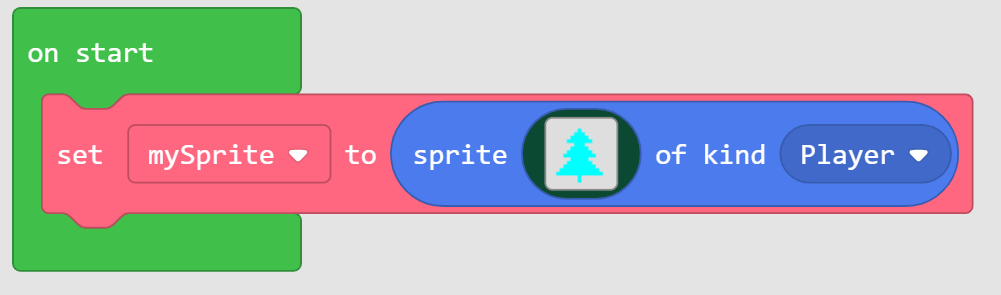
First, let us put something on the screen. Since I am writing this blog on Christmas then let it be a Christmas tree ![]()
And here is what the code looks like (if you click on the JavaScript tab). If you are not sure which blocks to add and how then simply copy the code below to the JavaScript tab and then go back to the Blocks view. MakeCode is awesome in the way code updates blocks and blocks update code.
enum SpriteKind {
    Player,
    Enemy
}
let mySprite: Sprite = null
mySprite = sprites.create(img`
. . . . . . . . . . . . . . . .
. . . . . . . 1 . . . . . . . .
. . . . . . 1 1 1 . . . . . . .
. . . . . 1 1 1 1 1 . . . . . .
. . . . 1 1 1 1 1 1 1 . . . . .
. . . . . . 1 1 1 . . . . . . .
. . . . . 1 1 1 1 1 . . . . . .
. . . . 1 1 1 1 1 1 1 . . . . .
. . . 1 1 1 1 1 1 1 1 1 . . . .
. . . . . 1 1 1 1 1 . . . . . .
. . . . 1 1 1 1 1 1 1 . . . . .
. . . 1 1 1 1 1 1 1 1 1 . . . .
. . 1 1 1 1 1 1 1 1 1 1 1 . . .
. 1 1 1 1 1 1 1 1 1 1 1 1 1 . .
. . . . . . . 1 . . . . . . . .
. . . . . . . 1 . . . . . . . .
`, SpriteKind.Player)
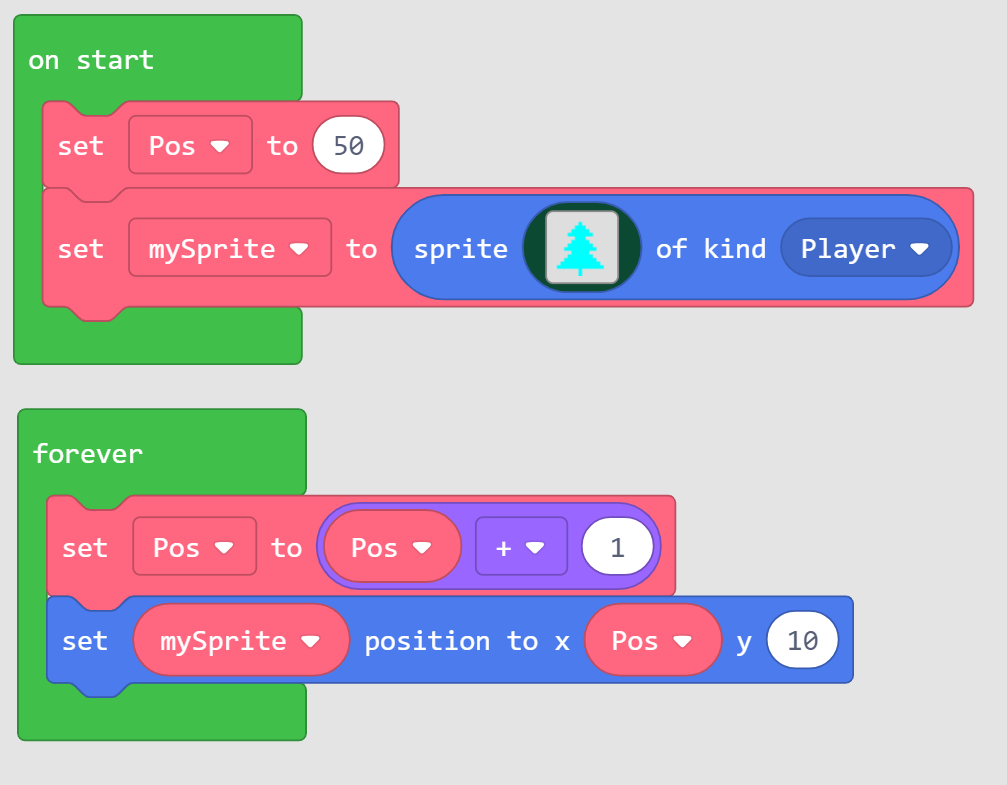
We simply created the sprite and put on the screen. Now we are ready to move the tree! We will do this by adding a variable. We will start this variable at 50 and then, in a loop, increment the variable by 1. the tree will then start moving 51, 52, 53, 54, 55…etc. At some point the tree will move outside the screen.
enum SpriteKind {
    Player,
    Enemy
}
let mySprite: Sprite = null
let Pos = 0
Pos = 50
mySprite = sprites.create(img`
. . . . . . . . . . . . . . . .
. . . . . . . 1 . . . . . . . .
. . . . . . 1 1 1 . . . . . . .
. . . . . 1 1 1 1 1 . . . . . .
. . . . 1 1 1 1 1 1 1 . . . . .
. . . . . . 1 1 1 . . . . . . .
. . . . . 1 1 1 1 1 . . . . . .
. . . . 1 1 1 1 1 1 1 . . . . .
. . . 1 1 1 1 1 1 1 1 1 . . . .
. . . . . 1 1 1 1 1 . . . . . .
. . . . 1 1 1 1 1 1 1 . . . . .
. . . 1 1 1 1 1 1 1 1 1 . . . .
. . 1 1 1 1 1 1 1 1 1 1 1 . . .
. 1 1 1 1 1 1 1 1 1 1 1 1 1 . .
. . . . . . . 1 . . . . . . . .
. . . . . . . 1 . . . . . . . .
`, SpriteKind.Player)
forever(function () {
    Pos = Pos + 1
    mySprite.setPosition(Pos, 10)
})
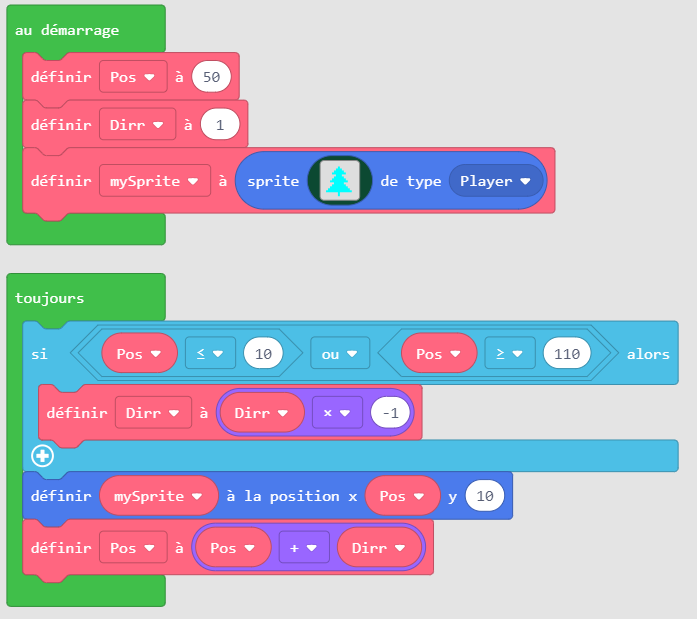
To make the tree move back and forth on the screen, you can use the “if statement” to check if the tree is too far out then move the tree back. Since the screen is 128 pixels wide, I will check that the tree position is less than 110. The easiest way is to control it direction by a variable that is positive when moving right and negative when moving left, then increment the position by that variable. I am going to call it Dirr.
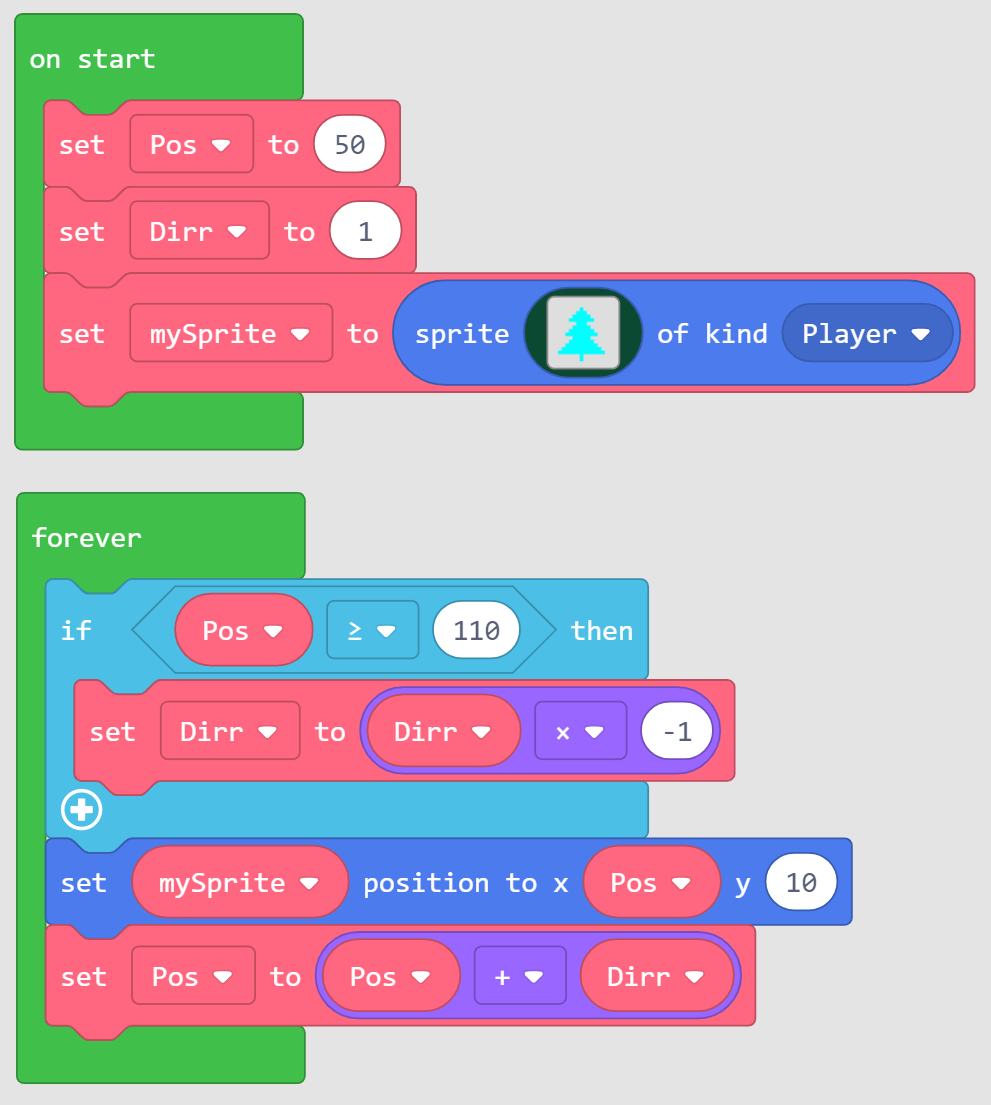
W00t! The tree just bounced back…but wait, it went off the left side of the screen! We simply solve this by checking the tree position and if it is less than 10 then reverse direction. We can use 2 if-statements for this, or just use one of them and then use logical or.
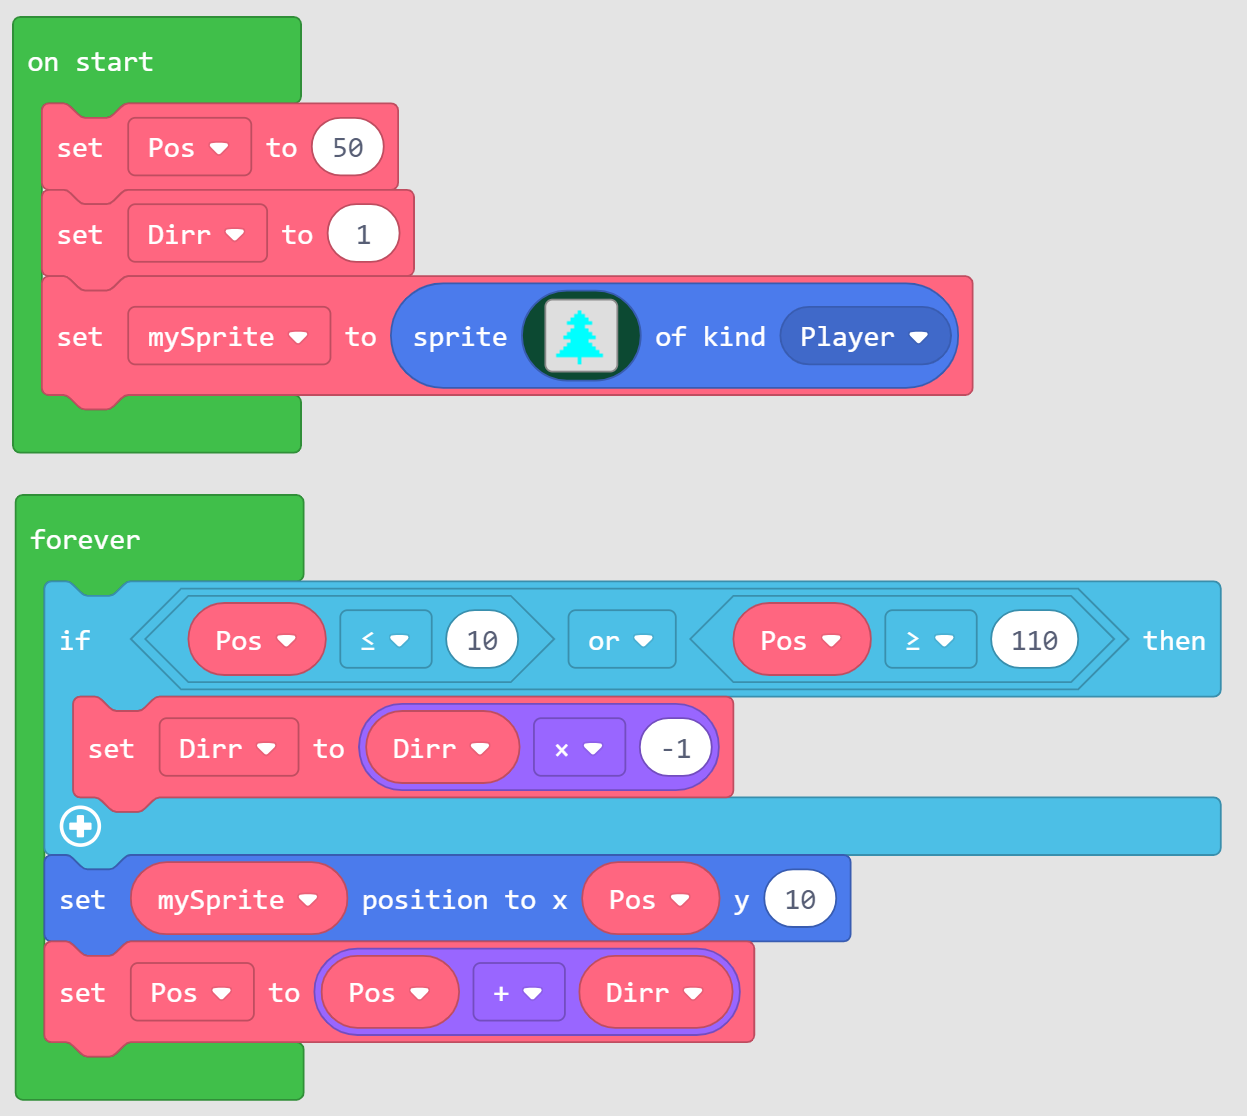
enum SpriteKind {
    Player,
    Enemy
}
let Pos = 0
let Dirr = 0
let mySprite: Sprite = null
mySprite = sprites.create(img`
. . . . . . . . . . . . . . . .
. . . . . . . 1 . . . . . . . .
. . . . . . 1 1 1 . . . . . . .
. . . . . 1 1 1 1 1 . . . . . .
. . . . 1 1 1 1 1 1 1 . . . . .
. . . . . . 1 1 1 . . . . . . .
. . . . . 1 1 1 1 1 . . . . . .
. . . . 1 1 1 1 1 1 1 . . . . .
. . . 1 1 1 1 1 1 1 1 1 . . . .
. . . . . 1 1 1 1 1 . . . . . .
. . . . 1 1 1 1 1 1 1 . . . . .
. . . 1 1 1 1 1 1 1 1 1 . . . .
. . 1 1 1 1 1 1 1 1 1 1 1 . . .
. 1 1 1 1 1 1 1 1 1 1 1 1 1 . .
. . . . . . . 1 . . . . . . . .
. . . . . . . 1 . . . . . . . .
`, SpriteKind.Player)
Dirr = 5
Pos = 50
forever(function () {
    if (Pos <= 10 || Pos >= 110) {
        Dirr = Dirr * -1
    }
    mySprite.setPosition(Pos, 10)
    Pos = Pos + Dirr
})
Here is a nice surprise! You can use Dirr variable to control speed as well. Change Dirr to 5 and observe how the tree moves 5 times faster. So wait, are we talking about vectors? Learn more about vectors An introduction to vectors - Math Insight
It must be exciting to see the tree going back and forth but what about going all over the screen? We can do so by simply doing the same for the y position. Remember X is left and right and Y is up and down. This is going to be your homework challenge.
The complete project is shared here https://makecode.com/_7iUh9mT5h9he