Did you know hidden within the programming interface of BrainPad are things called the Animation and Game Extensions?
You can use these extensions and their built in blocks to create all different kinds of simple games and animations.
Adding it is as easy as starting a new Microsoft MakeCode BrainPad project
- Navigate to makecode.brainpad.com
- Start a new project
- Under the ADVANCED tab at the BOTTOM, Select EXTENSIONS
- Select the ‘Animation’ extension.
After selecting, you’ll notice 5 new block categories added to our menu, specifically:
- Game
- Sprites
- Controller
- Scene
- Animation
Let’s create a simple animation of a wheel or barrel rolling.
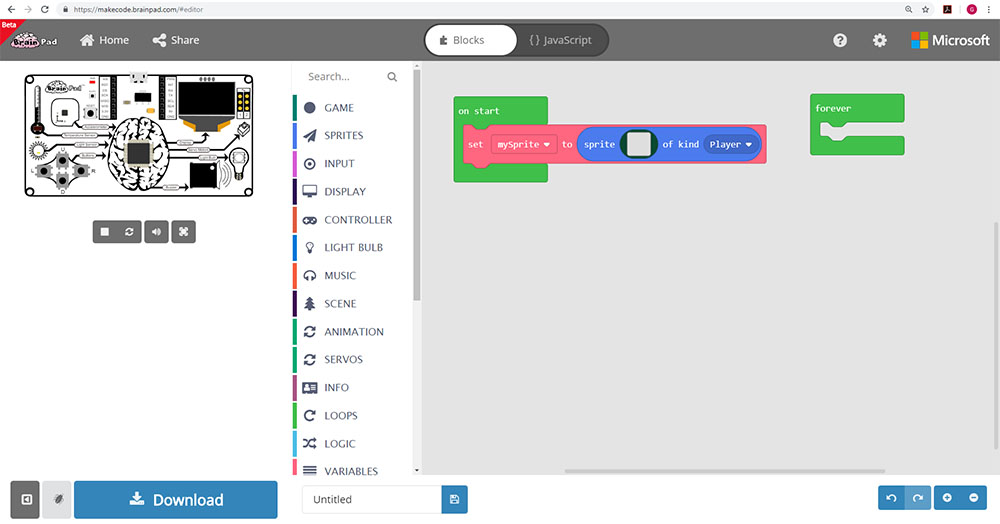
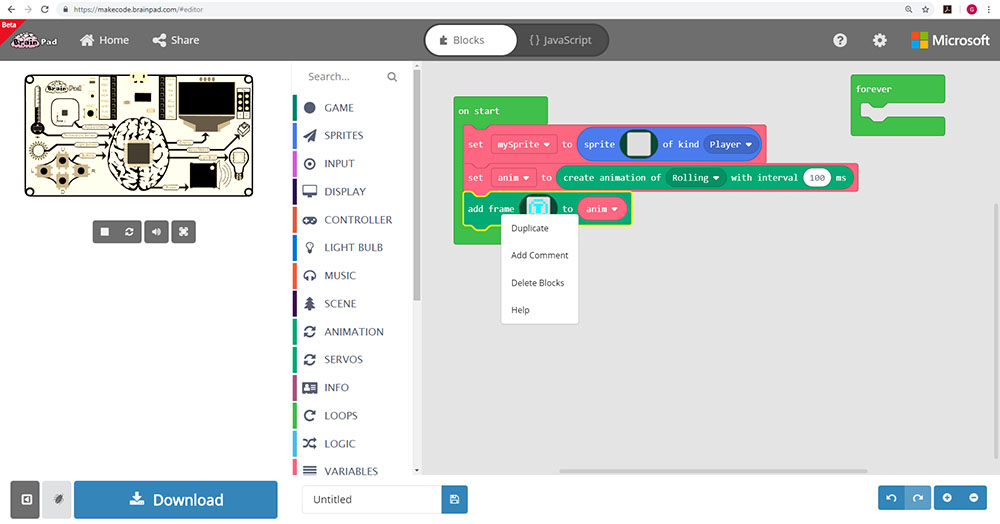
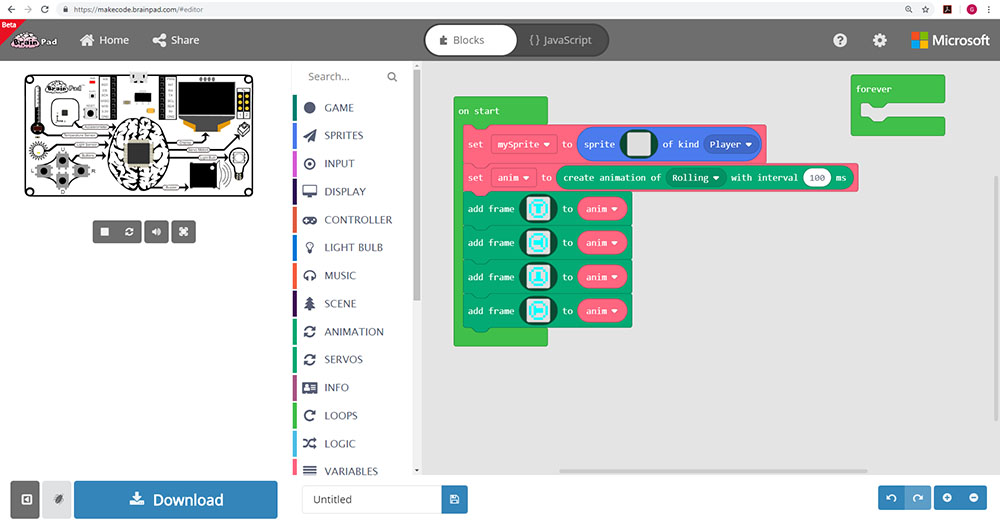
First we’ll drag in set mysprite to block. This creates the first sprite in our project, we can leave the default setting for this tutorial, we can also leave the image empty, because the actual sprite images we use will be added individually to the animation we create.
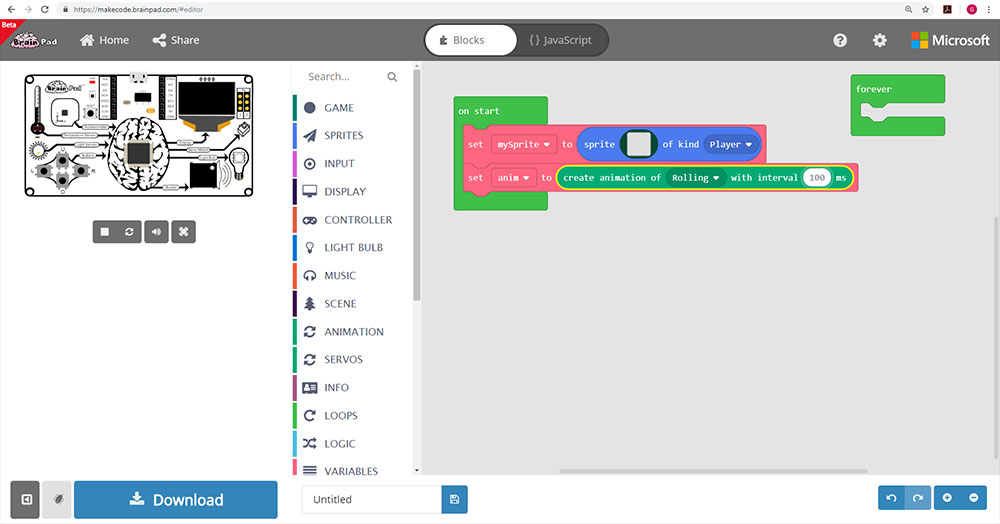
Next we’ll create the animation variable that will hold our frames by dragging in the set anim to block.
For this one we can create a new action called Rolling also let’s change the interval to 100 ms. This is how quickly the frames will change within our animation.
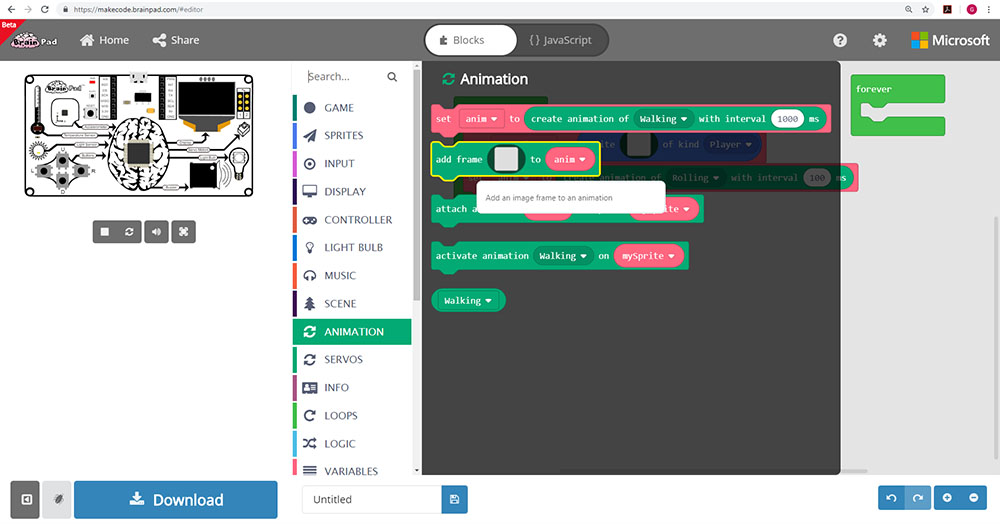
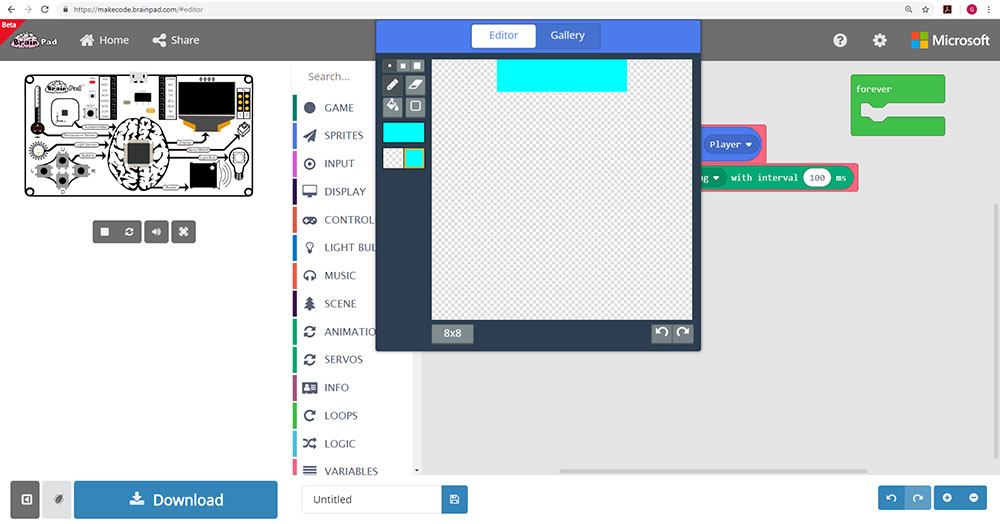
Next we’ll grab the add frame to block, in this block we will create our first frame of animation.
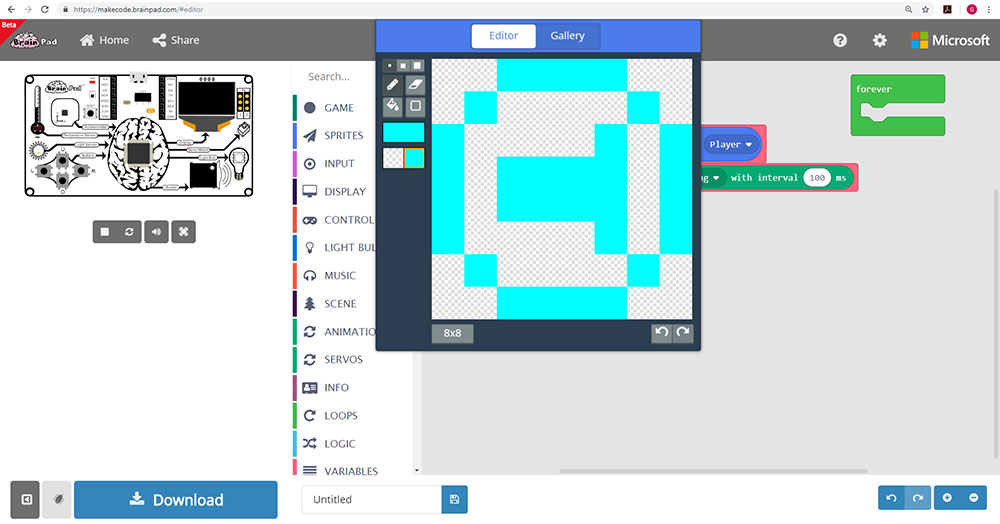
Click on the image box in the add frame to block. Here can change the size of the Sprite we want to create by clicking on the size in the lower left corner of the Sprite editor. We will change ours to 8 x 8.
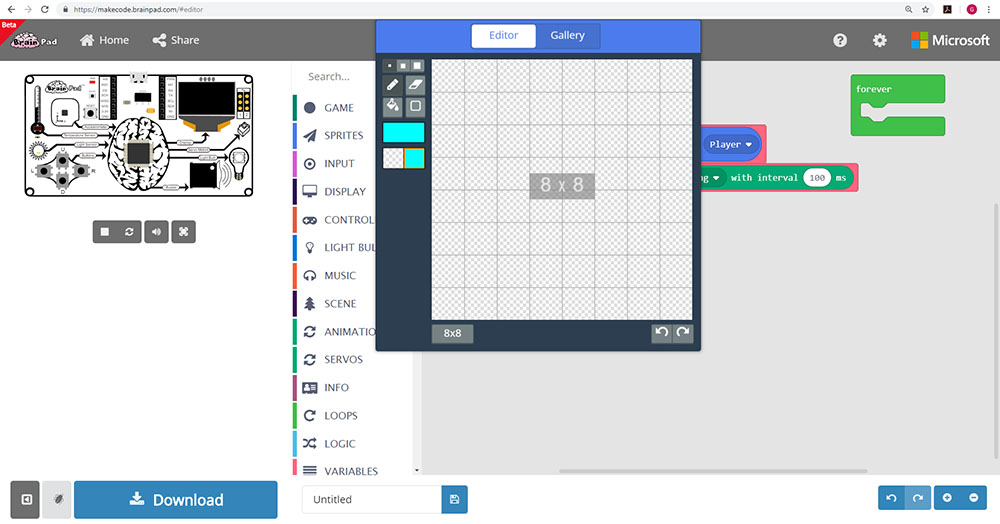
Skip the first two space then color in the next four and leave the last two spaces open. As shown below.
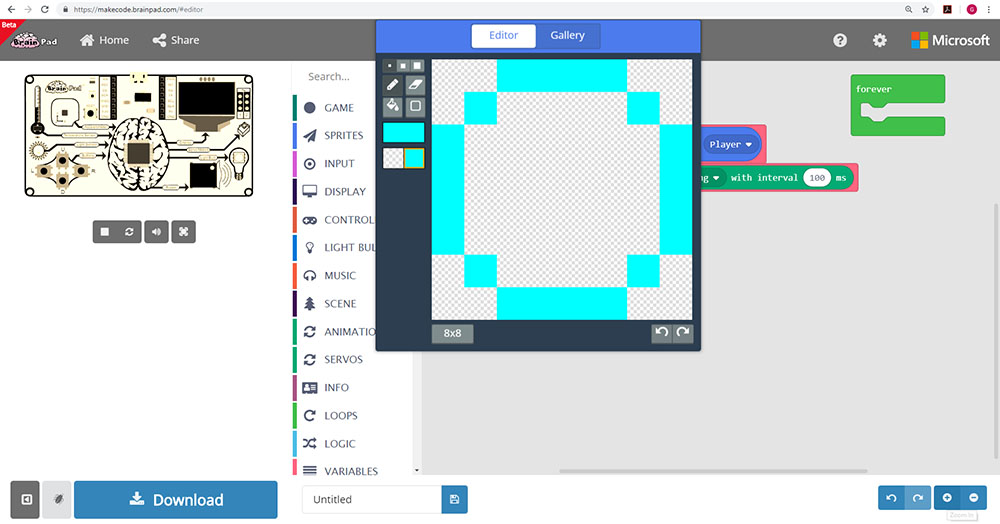
Next drop to the next two line and fill in like so:

Finally, follow this pattern until the whole “circle” is complete.
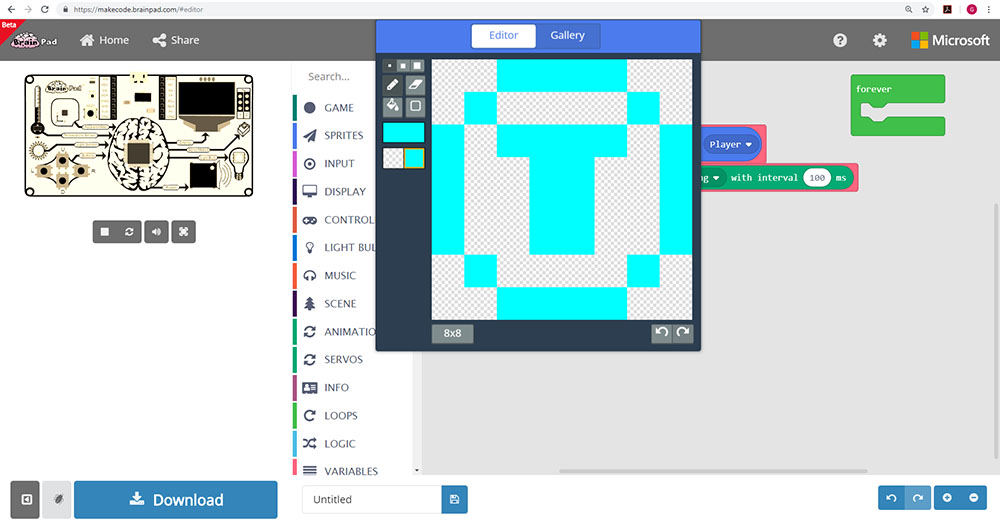
To create the animation illusion, we’ll add a T to the inside wheel hub that we can rotate, like so.
To save time we can right click on the add Frame block and duplicate it.
After we duplicate the add Frame block erase the middle T we created and draw a new T 90 degree rotated.
Duplicate again and re-draw our T another 90 degrees rotated.
Once completed we will have 4 frames that we’ve added to the anim variable we created.
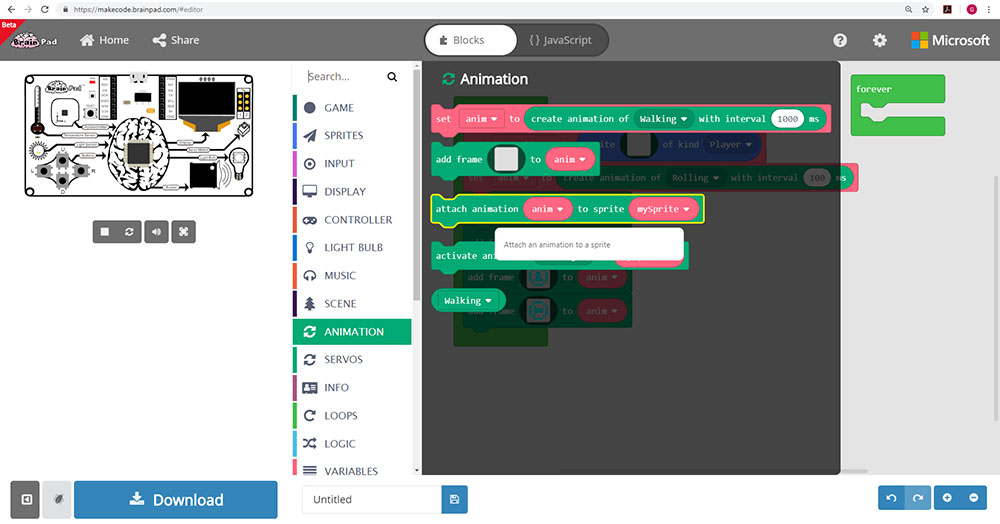
Next, we need to attach the animation to our sprite.
We do this by selecting the attach animation block to our sprite.
Finally, we need to activate the animation. We do this by grabbing the activate animation block and changing its action to Rolling and place it inside the Forever loop.
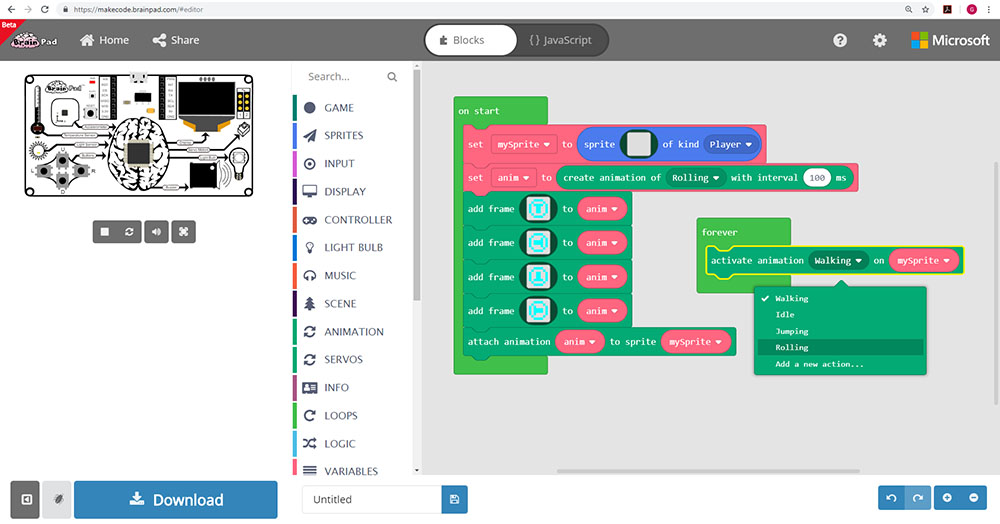
Once we added it to the forever loop the sprite will start the animation in the middle of our simulator.
We can use the Sprite positioning block to place our newly animated sprite where ever we like in the scene. We can also change the x or y coordinates of the sprite and move it around our scene, either by itself or with buttons controlling it
The same technique as above is used to create all the different animations for our program. In the next part, I’ll talk about creating another sprite Player to interact with other sprites we created to make a simple game.
The complete Microsoft MakeCode Animation project can be found here
https://makecode.com/_E4rcsjftJ4hH