Originally published at: 7 Segment Servos – BrainPad
How it works
This project uses 7 positional servo motors to mimic a 7 Segment display. To do this we’ve created a 3d printed ‘segment’ that we attach to each of our positional servos and then mount them on a piece of acrylic.
Hardware
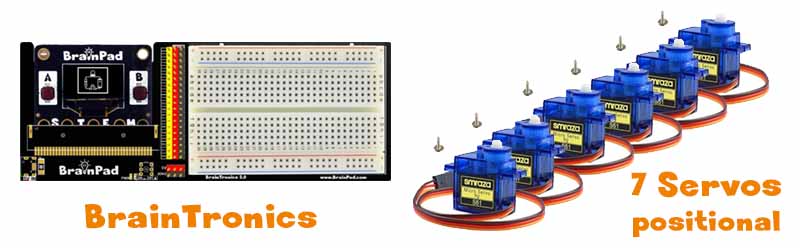
We’ll be using the BrainTronics kit to connect 7 positional servos to our Pulse. These servos are very common and readily available.
We’re going to use the Pulse as our microcontroller, but this project is also compatible with BrainPad Rave or BrainPad Edge.
7 segment displays have been used for many years in electronics to create numbers and some characters.

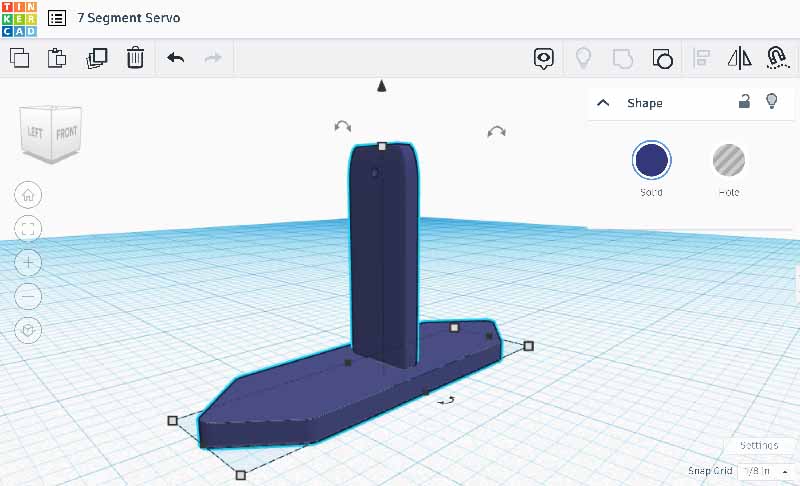
We created the 3d file of the segments to attach to each servo in Tinkercad
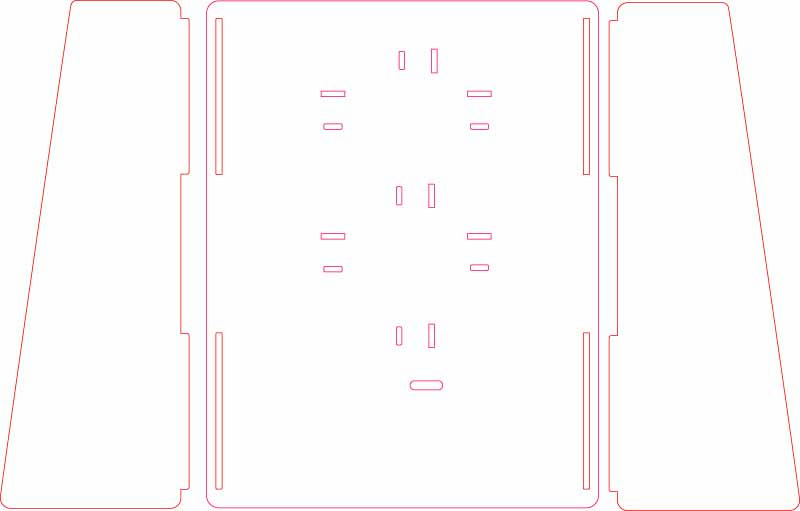
The project will be mounted on a piece of laser cut acrylic, but you can use any flat surface that you can mount servos to.
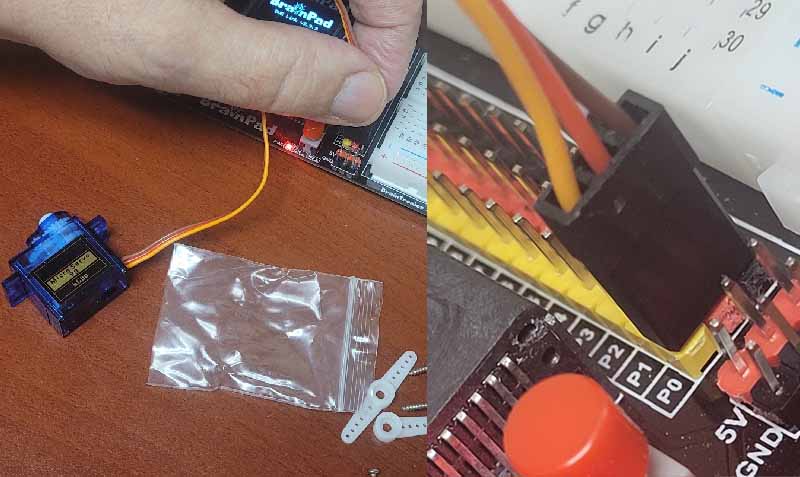
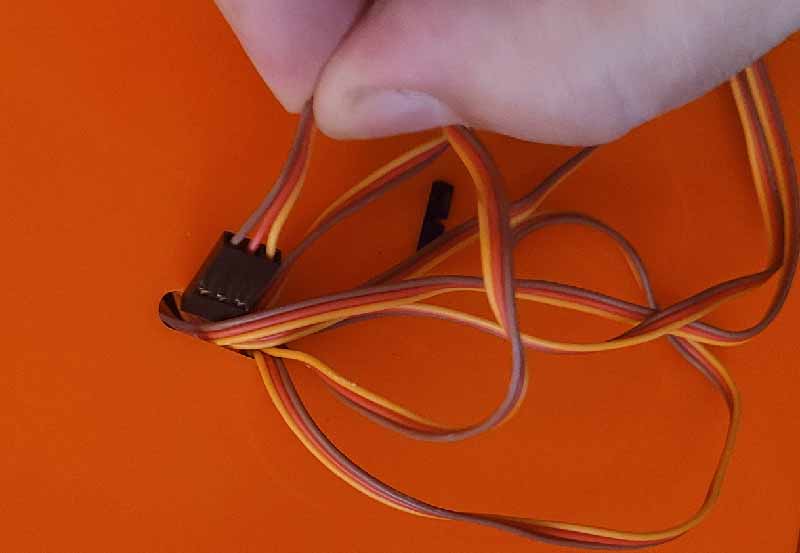
The first step once we have everything 3d printed and cut is to set our servos to the correct initial positioning. We want to set all servos to 90 degrees. Some servos this can be done by hand others we may need to use code to set them. Connect the servo to P0 on the BrainTronics. Notice the color coding of the wires.
We can use this line of code to set each servo to 90 degrees. This can be done inside the ‘Immediate Window’ of the DUE Console

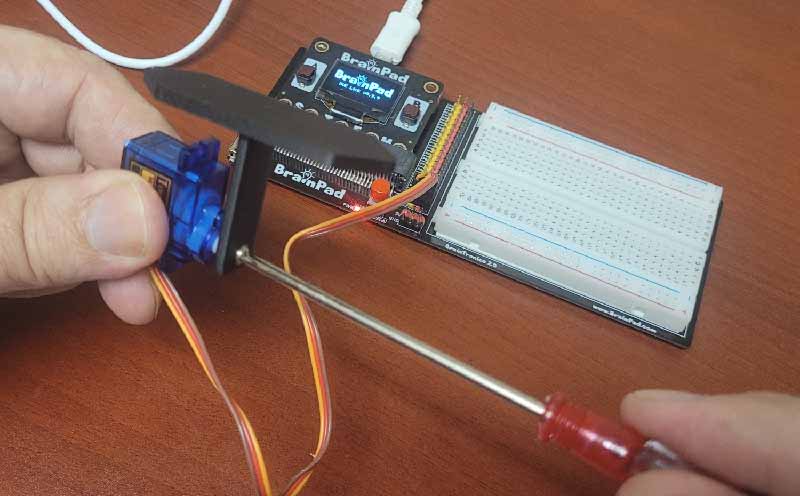
Once all the servos have been set to 90 degrees, we can attach our 3D printed segment to the servo using the long screw that came with the servo. Attach as shown in the picture below.
Route the servo wires into the smaller holes of the acrylic base. The larger hole is so the servo will rest flat onto the acrylic base.
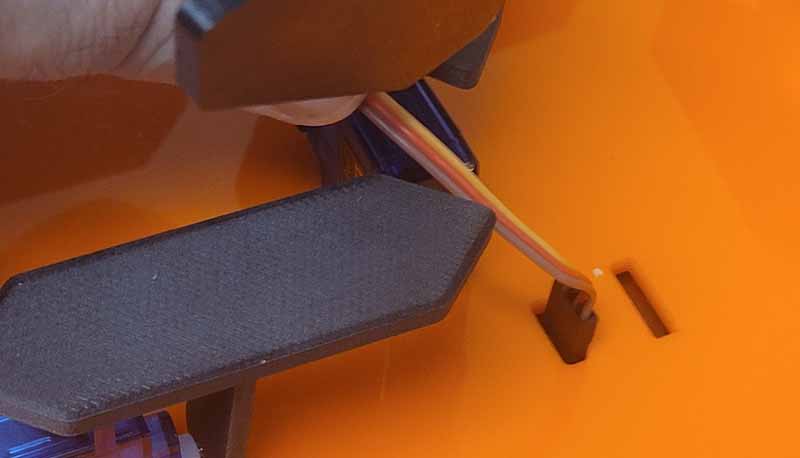
We can attach the servo to the acrylic base using either a strong 2-way tape or adhesive. When using an adhesive give the servos plenty of time to set properly.

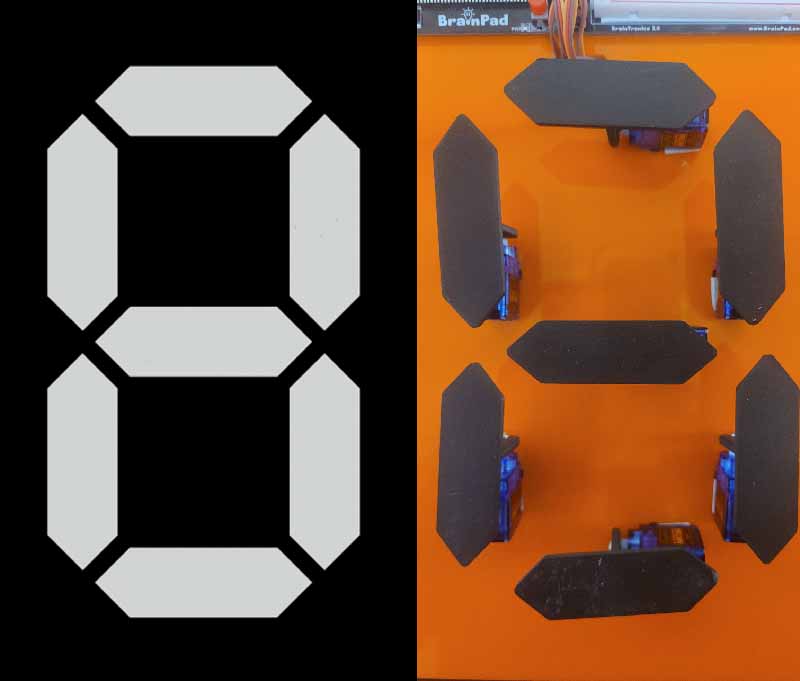
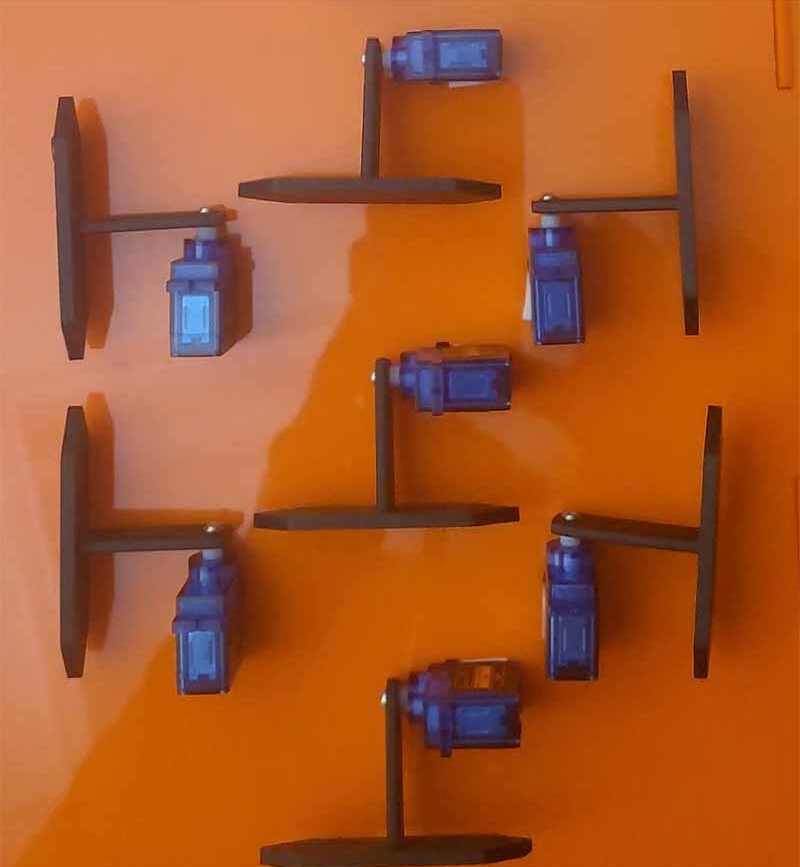
Once completed our project should look like the number 8.
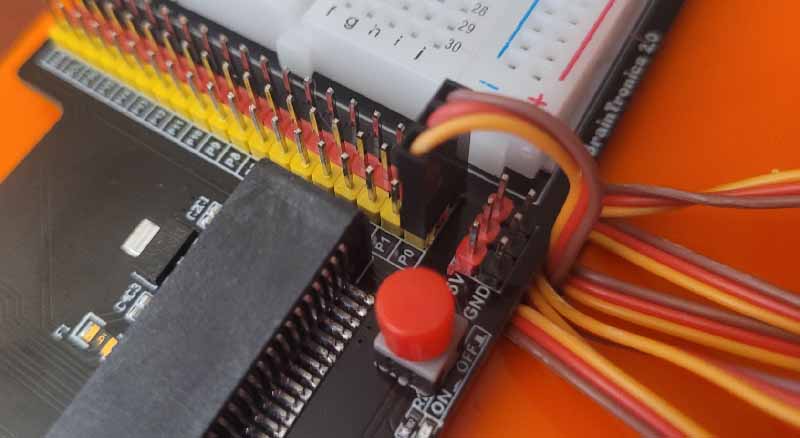
From the bottom of our base route each wire through the hole near the top.
Turn the base back over to the front and mount the BrainTronics just above the hole.

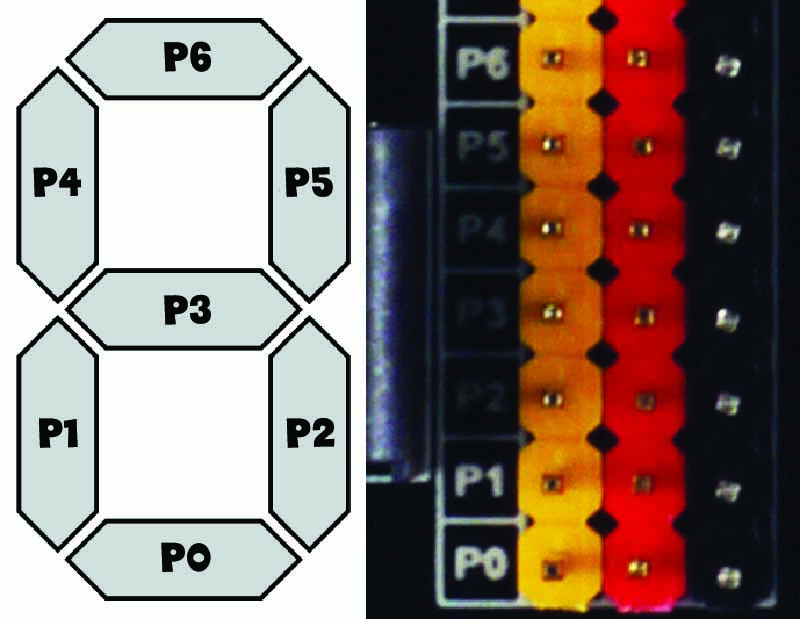
Now we need to connect each servo to the pin headers of the BrainTronics. Use the number from the image below to know what pin to connect each servo to.
Now were ready to code our first servo movement. The first thing we want program is our RESET position. All servos except the servos at position P5 & P2 are set to 0. Set the P5 & P2 servos to 180. This will prevent the servos from running into each other when resetting. Let’s put them inside a label we call ‘Reset’
@Reset
ServoSet(6, 0)
ServoSet(5, 180)
ServoSet(4, 0)
ServoSet(3, 0)
ServoSet(2, 180)
ServoSet(1, 0)
ServoSet(0, 0)
Return
If we run this code our servos should end up in the position below.
Now let’s move them all to create the number 8, if we remember since we set all the servos to 90 degrees we just need to create code to do the same. Here is some code that cycles between RESET and EIGHT. We create two different Wait() variable, one for pause between changing the number, and one how long the number stays up.
d=500 #delay
p=500 #pause
@Loop
    Reset()
    Wait(p)
    Eight()
    Wait(d)
goto Loop

@Eight
ServoSet(6, 90)
ServoSet(5, 90)
ServoSet(4, 90)
ServoSet(3, 90)
ServoSet(2, 90)
ServoSet(1, 90)
ServoSet(0, 90)
Return

@Reset
ServoSet(6, 0)
ServoSet(5, 180)
ServoSet(4, 0)
ServoSet(3, 0)
ServoSet(2, 180)
ServoSet(1, 0)
ServoSet(0, 0)
Return
Our project should now cycle between RESET and the number EIGHT.

Since the number 8 uses ALL the servos, we now know what we need to make each individual number. The code sample below starts with NINE and counts down to ZERO and repeats.
d=500 #delay
p=500 #pause
@Loop
    Reset()
    Wait(p)
    Nine()
    Wait(d)
    Reset()
    Wait(p)
    Eight()
    Wait(d)
    Reset()
    Wait(p)
    Seven()
    Wait(d)
    Reset()
    Wait(p)
    Six()
    Wait(d)
    Reset()
    Wait(p)
    Five()
    Wait(d)
    Reset()
    Wait(p)
    Four()
    Wait(d)
    Reset()
    Wait(p)
    Three()
    Wait(d)
    Reset()
    Wait(p)
    Two()
    Wait(d)
    Reset()
    Wait(p)
    One()
    Wait(d)
    Reset()
    Wait(p)
goto Loop

@Zero
ServoSet(6, 90)
ServoSet(5, 90)
ServoSet(4, 90)
ServoSet(2, 90)
ServoSet(1, 90)
ServoSet(0, 90)
Return

@One
ServoSet(5, 90)
ServoSet(2, 90)
Return

@Two
ServoSet(6, 90)
ServoSet(5, 90)
ServoSet(3, 90)
ServoSet(1, 90)
ServoSet(0, 90)
Return

@Three
ServoSet(6, 90)
ServoSet(5, 90)
ServoSet(3, 90)
ServoSet(2, 90)
ServoSet(0, 90)
Return

@Four
ServoSet(5, 90)
ServoSet(4, 90)
ServoSet(3, 90)
ServoSet(2, 90)
Return

@Five
ServoSet(6, 90)
ServoSet(4, 90)
ServoSet(3, 90)
ServoSet(2, 90)
ServoSet(0, 90)
Return

@Six
ServoSet(6, 90)
ServoSet(4, 90)
ServoSet(3, 90)
ServoSet(2, 90)
ServoSet(1, 90)
ServoSet(0, 90)
Return

@Seven
ServoSet(6, 90)
ServoSet(5, 90)
ServoSet(2, 90)
Return

@Eight
ServoSet(6, 90)
ServoSet(5, 90)
ServoSet(4, 90)
ServoSet(3, 90)
ServoSet(2, 90)
ServoSet(1, 90)
ServoSet(0, 90)
Return

@Nine
ServoSet(6, 90)
ServoSet(5, 90)
ServoSet(4, 90)
ServoSet(3, 90)
ServoSet(2, 90)
Return

@Reset
ServoSet(6, 0)
ServoSet(5, 180)
ServoSet(4, 0)
ServoSet(3, 0)
ServoSet(2, 180)
ServoSet(1, 0)
ServoSet(0, 0)
Return